Writing user stories is a fundamental skill for any software engineer entering an Agile environment. While many teams rely on digital platforms to manage tasks, understanding the core mechanics of a user story without software dependency builds a stronger foundation. This guide focuses on the manual process, using physical artifacts like sticky notes, whiteboards, and index cards to craft clear, actionable requirements. The goal is clarity of thought, not the convenience of a screen.
When you remove the software, you are forced to engage deeply with the content. There are no auto-complete features or pre-set templates to hide behind. You must articulate the value, the actor, and the need explicitly. This manual discipline ensures that the team understands the problem space before writing a single line of code. Below, we explore the anatomy of a story, the criteria for acceptance, and the methods for refining ideas without digital assistance.
📖 Understanding the Core Concept
A user story is a lightweight description of a feature told from the perspective of the person who desires the new capability, usually a user or customer of the system. It is not a specification document. It is a placeholder for a conversation. The physical act of writing a story on a card or paper reinforces this intent. It is meant to be moved, edited, discarded, or combined. Digital systems often lock you into a rigid structure too early. Manual methods keep the story fluid.
Why Go Manual?
There are several compelling reasons to practice writing stories manually, especially for new engineers:
- Focus on Value: Without fields to fill out, you concentrate on the actual value proposition.
- Cognitive Load: Writing by hand slows you down, allowing time to think before you commit to text.
- Collaboration: Physical cards allow teams to physically rearrange work, visualizing flow and priority.
- Independence: You learn the format so well that you can write valid requirements even if the tools are unavailable.
📋 The Anatomy of a Manual Story
Every user story follows a specific structure. When writing manually, use a consistent format on your index cards or sticky notes. This consistency allows the team to scan information quickly during planning sessions. The standard format consists of three distinct parts. Do not skip any of them.
1. The Persona (Who)
Identify the specific role or type of user. Avoid generic terms like “user.” Be precise. Is it an “Administrator,” “Guest Visitor,” or “Premium Subscriber”? The persona dictates the permissions and the context of the feature.
2. The Action (What)
Describe the capability or action the user wants to perform. This is the verb. It should be a high-level goal, not a technical implementation detail. For example, “search for items” is better than “input query into SQL database.” The action represents the user’s intent.
3. The Benefit (So That)
This is the most critical part often skipped by novices. Why does the user want this? What value does it provide? If you cannot answer this, the story might not be valuable. The “So That” clause connects the feature to a business or user outcome.
Example Structure
Write this on a single line or two. Keep it concise.
- As a [Persona],
- I want [Action],
- So that [Benefit].
📝 Defining Acceptance Criteria
A story is not complete without acceptance criteria. These are the conditions that must be met for the story to be considered done. When writing manually, these should be listed directly below the story card or on a separate sheet attached to it. They act as the test cases for the engineering work.
Acceptance criteria eliminate ambiguity. They define the boundaries of the feature. Without them, two engineers might implement different solutions for the same story. Manual writing forces you to think through edge cases before development begins.
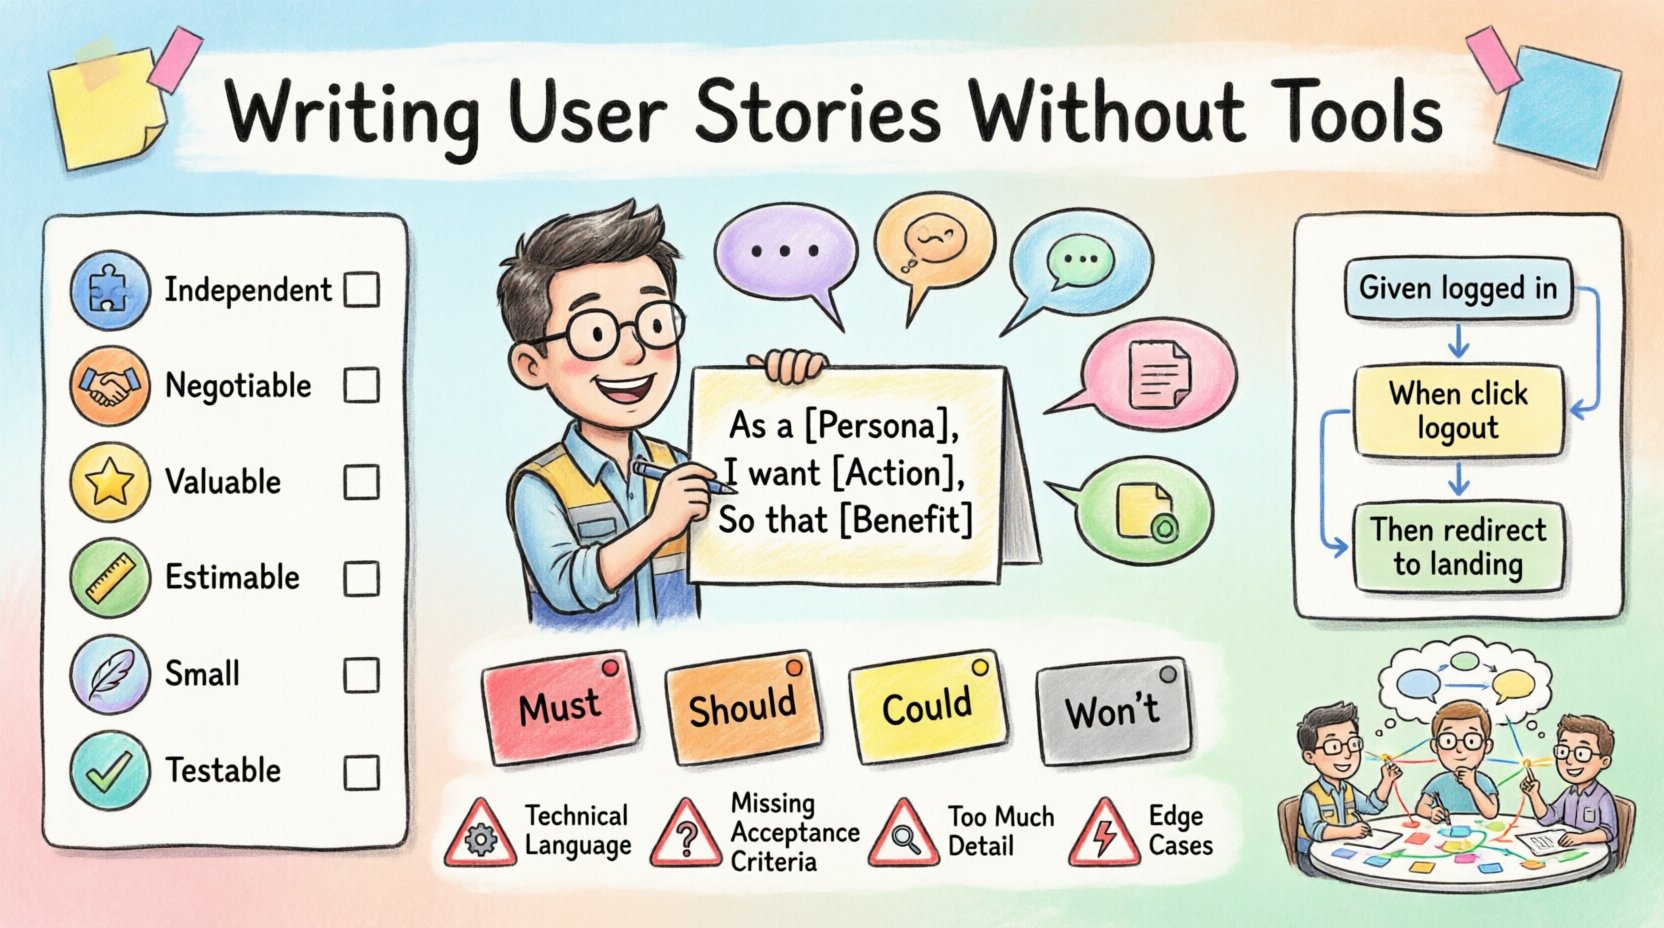
The Given/When/Then Format
For precise criteria, use the Given/When/Then structure. This is a manual translation of Behavior Driven Development (BDD). It structures the logic clearly.
- Given: The initial context or state.
- When: The event or action taken.
- Then: The expected outcome.
Example Criteria
- Given the user is logged in,
- When they click the logout button,
- Then they are redirected to the landing page.
- When they click the logout button,
Table of Criteria Types
Different types of criteria exist. A table helps categorize them during the manual writing process.
| Type | Description | Example |
|---|---|---|
| Functional | Specific behavior of the system | “System sends email after form submission” |
| Non-Functional | Performance or security constraints | “Page loads in under 2 seconds” |
| Business Logic | Rules governing the data | “Discount applies only to orders over $50” |
| Usability | Ease of use requirements | “Button must be visible without scrolling” |
🌐 Validating with the INVEST Model
Once you have written a story manually, you must validate its quality. The INVEST model is the standard framework for this. You can use a checklist on a separate sheet of paper to evaluate each story before adding it to the backlog. This ensures the work is manageable and valuable.
Independent
The story should be self-contained. It should not rely on another story being completed first to be valuable. While technical dependencies exist, the value should stand alone. If you have to wait for Story A to build Story B, consider if Story B can be split.
Negotiable
The story is a promise to discuss, not a contract. It allows for conversation between the engineer and the stakeholder. If the text is too detailed, it becomes a specification, not a story. Leave room for technical exploration.
Valuable
Every story must deliver value to the user or the business. If a story does not meet the “So That” requirement effectively, it should be discarded or reworked. Value is the primary driver of the backlog.
Estimable
The team must be able to estimate the effort required. If a story is too vague, it cannot be estimated. If it is too complex, break it down. Manual writing helps identify vagueness because you must physically write out the details.
Small
A story should be small enough to be completed within a single iteration or sprint. Large stories are risks. They often lead to incomplete work. If a story feels like a project, split it into smaller, sequential stories.
Testable
You must be able to verify the story is complete. If there are no acceptance criteria, the story is not testable. Manual writing forces you to define what “done” looks like clearly.
INVEST Checklist
Use this table to review your stories during planning.
| Letter | Question to Ask | Status |
|---|---|---|
| I | Can this be developed without the others? | [ ] |
| N | Is the scope open for discussion? | [ ] |
| V | Does it provide clear value? | [ ] |
| E | Can we guess the effort? | [ ] |
| S | Can it fit in a sprint? | [ ] |
| T | Are there clear pass/fail conditions? | [ ] |
🔍 The Refinement Process
Refinement, also known as grooming, is the activity of preparing stories for future development. You do not need software to refine. In fact, the physical act of moving cards around a table can improve the understanding of the flow. A refinement session involves reviewing stories, clarifying details, and breaking down large items.
Step 1: The Review
Gather the team around a large table. Lay out the cards. Read each story aloud. This simple action catches errors that are invisible when reading silently. Listen for ambiguity in the “So That” section.
Step 2: The Split
If a card feels too heavy, cut it. Write the new, smaller story on a fresh card. Place the new card above the original or to the side. Ensure the original card is updated to reflect the split. This visual separation helps manage scope.
Step 3: The Questions
During the review, the team asks questions. Write these questions on a separate sheet. Do not answer them immediately. Questions indicate gaps in knowledge. They become the action items for the next session. This separates the planning from the answering.
Step 4: The Sequencing
Arrange the cards in order of dependency or value. Use string or tape on the table to show connections. If Card A must happen before Card B, draw a line between them. This visual flow helps identify bottlenecks before development starts.
📈 Prioritization Techniques
Once you have a list of stories, you must decide what to build first. Manual prioritization methods are often more effective than digital sorting because they involve physical interaction with the work.
The MoSCoW Method
Color-code your cards or use different shapes to denote priority. This is a classic manual technique.
- M – Must Have: Critical for the release. No exceptions.
- S – Should Have: Important but not vital. Can be delayed if needed.
- C – Could Have: Desirable but not necessary.
- W – Won’t Have: Agreed to be left out of the current scope.
The Weighted Shortest Job First (WSJF)
For a more mathematical approach, assign numbers to value and time. Write the numbers on the card. Calculate the ratio manually. This forces the team to quantify value rather than rely on gut feeling. It is a valuable exercise for new engineers to understand business trade-offs.
⚠️ Common Pitfalls to Avoid
Even with a manual approach, mistakes happen. New engineers often fall into specific traps when writing stories without the guidance of software validation.
1. Technical Language
Do not write stories from the system’s perspective. Avoid words like “database,” “API,” or “backend.” Write from the user’s perspective. The system is invisible to the user. If you write “The system updates the cache,” the user does not care. They care about the speed of the page.
2. Missing Acceptance Criteria
It is easy to write the “As a…” part and forget the “So that…” or the criteria. A story without criteria is a to-do list item, not a user story. It creates ambiguity. Always require criteria before the card is considered complete.
3. Too Much Detail
Writing a story is not writing a spec. If you write five paragraphs on a single card, you have likely over-specified. Keep the card small. Details belong in the conversation during refinement, not on the card itself.
4. Ignoring Edge Cases
Manual writing often focuses on the happy path. You must explicitly write down what happens when things go wrong. Add criteria for error states. “Given the network is down, when the user submits, then they see a retry message.”
5. Lack of Collaboration
Writing a story in isolation is a waste of time. Stories are conversation starters. If you write a story without discussing it with a peer, it will likely be misunderstood. Always review manually with a colleague.
👩💻 Transitioning to Digital Later
While this guide focuses on manual methods, teams eventually move to digital systems for tracking and reporting. The skills you learn here transfer directly. When you eventually use a digital platform, you will write better stories because you understand the core structure. You will not rely on the software to define the value for you.
The transition is smooth if the foundation is solid. The digital tool becomes a repository for the manual work you have already thought through. You simply copy the card content into the system. The logic remains the same.
📝 Practical Exercise for New Engineers
To solidify these concepts, try the following exercise. It requires no software, only paper and a pen.
- Step 1: Pick a feature you use daily (e.g., a search bar on a website).
- Step 2: Write the user story on an index card using the standard format.
- Step 3: Write three acceptance criteria using Given/When/Then.
- Step 4: Apply the INVEST model checklist to the card.
- Step 5: Write down two questions you have about the story that a developer would ask.
- Step 6: Review the card with a peer. Ask them to critique the “So That” section.
💬 Final Thoughts on Manual Discipline
Mastering the art of the user story is about precision and empathy. It requires you to put yourself in the shoes of the user. It requires you to be clear and concise. The manual process strips away the noise of software interfaces and leaves only the message. This discipline makes you a better engineer. It makes you a better communicator.
When you strip away the tools, you are left with the logic. This logic is what drives software. By practicing manually, you ensure that your logic is sound before you ask the computer to execute it. This approach reduces rework and increases quality. It is a quiet confidence in your ability to define value.
Remember, the goal is not to fill a digital backlog. The goal is to solve a problem for a person. Keep the human in the loop. Keep the story simple. Keep the criteria clear. These principles will serve you well, regardless of the tools you eventually use.
📊 Summary of Key Takeaways
- Structure: Always use As a / I want / So that.
- Criteria: Define Given/When/Then for clarity.
- Validation: Check against INVEST before finalizing.
- Collaboration: Review cards physically with the team.
- Focus: Prioritize user value over technical implementation.